
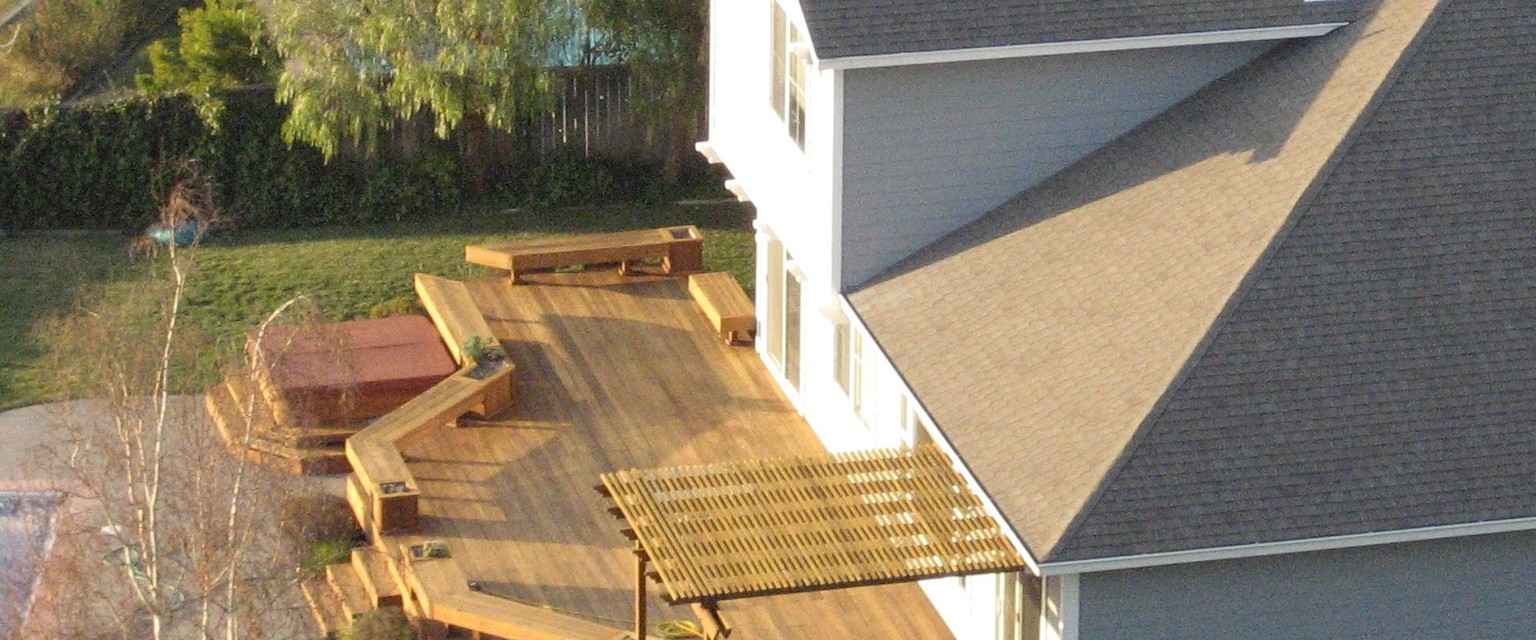
Building a Deck in Australia: Timber Calculator Guide and Cost Breakdown
A deck is one of those projects that sounds simple until you start pricing timber, counting boards, and wondering why every second product description says something mildly threatening like "allow for movement". Welcome to decking.
If you're planning a new deck in Australia, the good news is the maths is not hard. The bad news is the timber bill can still sneak up on you if you guess your quantities and hope for the best. This guide walks through how to calculate boards, how much wastage to allow, what timber options are common in Australia, and where the real costs usually show up.
If you want to skip the hand maths, use our Timber & Decking Calculator to estimate board count, lineal metres, timber volume, and weight in about 30 seconds.
Step 1: Work out your deck size
Start with the finished surface area, not the vague dream in your head. Measure the length and width of the deck in metres.
Deck area (m²) = Length × Width
Example: a 6 m × 4 m deck = 24 m².
That area helps you compare quotes and rough costs, but it does not tell you how many boards to buy. For that, you need to factor in board width and the gap between boards.
Step 2: Calculate how many decking boards you need
Most decking boards run along the length of the deck. The number of boards you need is based on how many fit across the width.
Boards needed = floor(Deck width ÷ (Board width + Gap))
Note: the last board needs no gap after it. Gap size varies by species, moisture content, and manufacturer — 5 mm is a common rule-of-thumb; confirm with your supplier.
Say your deck is 4 metres wide and you're using 140 mm boards (a common nominal width) with a 5 mm gap:
- Deck width = 4,000 mm
- Board width = 140 mm, gap = 5 mm
- Total width for N boards = N × board + (N − 1) × gap
The last board does not need a gap after it. So for 27 boards:
27 × 140 + 26 × 5 = 3,780 + 130 = 3,910 mm
That fits comfortably within 4,000 mm. But 28 boards would be:
28 × 140 + 27 × 5 = 3,920 + 135 = 4,055 mm — too wide
So the correct count is 27 boards before wastage. Note that actual board widths vary — many hardwoods are sold as 135 mm or 136 mm actual width, not exactly 140 mm. Always check the specific product you are buying and use those actual dimensions in the calculation.
For those 27 boards at 6 metres long, your total lineal metres are:
27 boards × 6 m = 162 lineal metres
Then add wastage, which brings us to the part most DIY budgets conveniently "forget".
Step 3: Add wastage properly
For a simple rectangular deck, 10% wastage is a sensible starting point. That covers trimming, end cuts, damaged boards, and the occasional "well that cut looked straighter in my head" moment.
If your deck has angles, stairs, picture framing, or fancy layout patterns, you may need more.
Using the corrected example:
- 27 boards before wastage
- 10% wastage = 2.7 boards
- Rounded up total = 30 boards
This is exactly why a calculator is handy. The numbers are simple, but it is very easy to order just under what you need and then spend next weekend hunting for matching stock from a different bundle.
Which timber should you use?
There is no single best decking timber. There is only the best option for your budget, maintenance tolerance, and whether you enjoy oiling timber every year or would rather pretend that is Future You's problem.
Treated pine
- Usually the cheapest entry point
- Easier on the budget for larger decks
- Needs ongoing sealing or staining
- Does not have the same premium look as hardwood
Australian hardwoods like spotted gum and blackbutt
- Popular for a premium natural finish
- Dense and durable when properly installed
- Usually more expensive than pine
- Still need maintenance if you want to keep the fresh colour
Merbau
- Still widely used and generally durable
- Rich colour that many people like
- Can bleed tannins early on
- Raises sustainability questions, so check sourcing carefully
If you're weighing up materials, start with appearance and maintenance first, then price the actual board quantities. The cheap board that needs constant attention is not always the cheap board in real life.
What else do you need besides deck boards?
This is where many first quotes go from "not too bad" to "oh right, the deck needs to stay up".
Your board calculation only covers the visible decking surface. A real deck budget may also include:
- Subframe timber for joists, bearers, and posts
- Concrete footings for posts or stirrups
- Fixings such as screws, clips, brackets, and connectors
- Weed mat, drainage, or ground prep if the site is rough
- Oil, stain, or sealer for the final finish
- Stairs, balustrades, and screening if the deck is raised
If you're setting posts or footings, our Concrete Calculator is useful for estimating how much concrete you'll need before you end up doing panic maths in the Bunnings car park.
And if you're sealing or coating surrounding timber features, the Paint Coverage Calculator can help estimate coverage for walls, screens, and adjacent finishing work. It is not a perfect stain calculator, but it is still handy when you're pricing the broader job.
A simple cost breakdown example
Let's use that same 6 m × 4 m deck again. This is not a quote. It is a planning example so you can see how the budget usually breaks apart.
| Item | Example allowance |
|---|---|
| Deck boards | Depends on species, width, and length |
| Subframe timber | Often a major share of materials |
| Concrete for footings | Depends on post count and footing size |
| Fixings and brackets | Easy to underestimate |
| Oil, stain, or sealer | Varies by finish and number of coats |
| Labour | Can exceed material cost on complex builds |
For a ground-level rectangular deck, DIY materials might be manageable if the site is flat and accessible. Once you add height, stairs, balustrades, awkward access, or premium hardwood, the price can escalate fast. That is not tradies being dramatic. It is just a lot more structure, labour, and compliance.
What usually blows the budget?
1. Underestimating the subframe
People focus on the pretty top boards because that is what you see on Instagram. Builders focus on joist spacing, footings, connections, and drainage because that is what stops the deck turning into an expensive trampoline.
2. Picking timber before checking availability
Some species, profiles, and lengths are easier to source than others. If you design around a board that is hard to get locally, you can pay more or compromise later.
3. Forgetting finishes and maintenance
Natural timber may need oiling or sealing to keep the look you want. If you love that fresh hardwood colour, budget for the upkeep. If you do not, accept that weathering to a silvery grey is not a personal attack.
4. Not checking approval requirements early
Approval rules vary by state, council area, and the design itself. Height above ground, attachment to the house, stairs, balustrades, boundary setbacks, and overlays such as heritage, bushfire, or flood zones can all affect what is required. Depending on the job, that may mean a building approval, a planning permit, or no formal approval at all for simple low decks. Check first, build second. Much less paperwork that way.
DIY or hire a builder?
If it is a simple low deck and you are comfortable with measuring, cutting, levelling, and following structural guidance, DIY can save serious money. But if the deck is raised, attached to the house, or needs stairs and railings, professional help often makes sense.
A crooked shelf gives you character. A crooked deck gives you water issues, trip hazards, and a reason for your mates to quietly judge your spirit level work.
Quick checklist before you order anything
- Measure deck length and width
- Choose board width, thickness, and gap size
- Calculate board count and add at least 10% wastage
- Price the subframe, fixings, and footings separately
- Check local approval requirements
- Plan for finishing products and future maintenance
Frequently asked questions
How much decking timber do I need?
Measure the deck width, calculate how many boards fit accounting for the gap and remembering the last board needs no gap after it, then round up and add wastage. For example, a 4 m wide deck using 140 mm boards with 5 mm gaps needs 27 boards before wastage, or about 30 boards with a 10% buffer. Note: actual board widths vary — many hardwoods are sold as 135 mm or 136 mm, not exactly 140 mm.
What timber is best for an Australian deck?
Treated pine is budget-friendly, while spotted gum and blackbutt are popular premium hardwood choices. Merbau is still common, but many buyers now look closely at sustainability and sourcing. The right choice depends on budget, look, and maintenance tolerance.
How much does it cost to build a deck in Australia?
There is no one-size-fits-all number. Size, species, site conditions, deck height, labour, and extras like stairs or balustrades all affect the final price. The safest approach is to build your cost from the bottom up: boards, frame, footings, fixings, finishes, then labour.
Do I need approval to build a deck?
Sometimes. Requirements vary across Australia, so always check your state and local rules before building. Depending on the project, that could mean planning approval, a building permit, certification, or nothing formal for a simple low deck. Raised or attached decks are more likely to trigger requirements.
Use the Timber & Decking Calculator to estimate board count and lineal metres before you order, then use the Concrete Calculator if your build needs posts or footings.